Peanut Butter Chocolate Chunk Cookies!! by Indiana Baker


Peanut Butter Chocolate Chunk Cookies:

Use your favorite peanut butter cookie recipe; like this one minus the filling!
Add peanut butter chips and chocolate chunks.
Bake for 10-12 min until golden brown; baking time may differ from your cookie recipe because of the added chips and chunks!!

These are so good and favorite in my house!

~Janet aka Indiana Baker

Linky Post: A Baker's Dozen

rose from our garden
A few of the blogs I read do linky posts on Fridays. I am an Internet junkie and thought I'd share some of the stuff I find online with all of you. Not sure I'll be doing one every week, but here and there when I find stuff I want to share!!
  1. I want to make this cake!! Maybe not the exact same cake, but a version of it!
  2. I stumbled across this site (site removed 1.2.2016) and have become obsessed with getting a copy of her out of print book!
  3. Because of this movie I have always wanted to own a candy store and/or factory!
  4. Would love to take this e-course.
  5. I want this camera. I don't ask much! 
  6. Would love to go here again or here for the first time!!
  7. This day course (link removed) would be a great way for me to get back in to a print studio!
  8. These danishes look delicious and easy to make!!
  9. I love her work. I'm distantly related to her as well!!
  10. These nails are so cute! I wonder if I could do them myself? (link removed 2017)
  11. I need to buy a subscription to this magazine.
  12. I watch these fabulous bakers on Channel Four every Wednesday! Also want their book that goes along with their show!! (of course I do!)
  13. This pastry shop will be opening a branch in Reading soon!!
Reading Riverside
Hope you enjoyed being lead around the Internet by me for a day!!

Nestle Toll House Cookies!!


My friends, Scott and Katie, were in London for New Year's and brought me a package of Nestle' Chocolate Chips.

We met them for dinner in London (check out my dessert!) Here in England they sell chocolate chips, but they are not the same.

 First off they come in either milk or dark- no semi-sweet or bittersweet. The brands available are only so/so, you'd almost be better buying a nice bar of chocolate and breaking it up yourself. Then they come in 100g bags: 11.5oz = 326g!! I'd have to buy at least 3 bags to get 1 bag of Nestles'. Then to top it off the chocolate chips are way smaller then the Nestle ones!!

So, I was really grateful to my friends for this thoughtful gift!! Nothing beats Toll House Chocolate Chip cookies when you need a cookie fix! I love mine with a cold glass of milk. Reminds me of my childhood. My sister and I used to bake these from scratch from time to time.

Toll House Chocolate Chip Cookies:

2 1/4 cups all-purpose flour
1 teaspoon baking soda
1 teaspoon salt
1 cup (2 sticks) butter, softened
3/4 cup granulated sugar
3/4 cup packed brown sugar
1 teaspoon vanilla extract
2 large eggs
2 cups (12-oz. pkg.) Nestle Toll HouseSemi-Sweet Chocolate Morsels

Preheat: oven to 375° F.
Combine  flour, baking soda and salt in small bowl. Beat butter, granulated sugar, brown sugar and vanilla extract in large mixer bowl until creamy. Add eggs, one at a time, beating well after each addition. Gradually beat in flour mixture. Stir in morsels and nuts. Drop by rounded tablespoon onto ungreased baking sheets. I used my icecream scooper that I use for cupcakes to make these cookies big. It says you should be able to get about 5 dozen cookeis, I had 1 1/2 dozen maybe? Bake for 9 to 11 minutes or until golden brown. Cool on baking sheets for 2 minutes; remove to wire racks to cool completely.


note: Nestle Toll House Chocolate Chips can be sourced through many different online American grocery stores/shops. However because of duty charges and shipping costs they are over priced and unless in a real fix would never buy them at that price! The recipe is from the package of the chocolate chips. 

Red Velvet Whoopie Pies!!

HAPPY CHINESE NEW YEAR! 

I had planned to make these whoopies yesterday so the post would have been up in order to celebrate the Chinese New Year, but the weekend was busy and so I literally made these tonight.

I used the Red Velvet Whoopie Pie recipe from the Hummingbird Bakery Cake Days and the cream cheese filling from The Whoopie Pie Book by Claire Ptak. 

Then bought some really fun Shimmer Spray in gold made by Dr. Oetker. This spray was a lot of fun, but made it hard to get a good picture as it was so shiny!

I choose red velvet because of this passage taken from wikipedia on symbolism during the Chinese New Year:

"Red is the predominant colour used in New Year celebrations. Red is the emblem of joy, and this colour also symbolises virtue, truth and sincerity. On the Chinese opera stage, a painted red face usually denotes a sacred or loyal personage and sometimes a great emperor. Candies, cakes, decorations and many things associated with the New Year and its ceremonies are coloured red..."


2012 Year of the Dragon
Mini-Baker made this mask at pre-school!!
whoosh! the red goes in!

batter ball ready for the oven, it was very sticky
out of the oven

enough for 2 plates one red and one gold!!

Yum.


My ABC of important things

Susannah Conway's blog is one I have been reading for well over a year now and one I not only enjoy to read, but one I respect and admire. She asked her readers what they would include in their ABC list of important things. Here are mine!

A is for Art: What is art? It’s a time old question; my reply would be that art is everything. Life without art wouldn’t be worth living!

B is for Baking: Duh! My newest art form comes as brownies, cakes, cookies, pies etc… (see: C, I, and P)


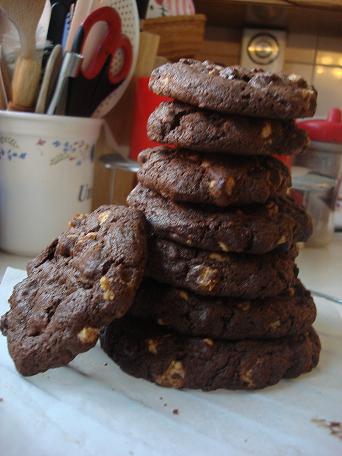
C is for Cakes and Cookies and Comfort and Celebration: I love creating things and creating edible things is even better. Cakes and Cookies are my Comfort food (see: S) on a bad day, but I also use Cakes and Cookies to Celebrate many different occasions!! 

D is for Daughters: Mini-Baker and Baby-Baker (not a baby for too much longer) are everything to me. Once you have kids there is no going back, unconditional love is something words cannot explain.

E is for Expatriate: "An expatriate (in abbreviated form, expat) is a person temporarily or permanently residing in a country and culture other than that of the person's upbringing. The word comes from the Latin terms ex ("out of") and patria ("country, fatherland")." I am an American who has lived in the United Kingdom for almost 7 years now. It’s been an experience!

F is for Fun: Fun Fun Fun!! Life is short have fun while you can!


G is for Grape: More specifically for Grape flavoured candy/sweets. In a pack of Skittles/Starbursts/other fruit chewy candy/sweets in the UK is blackcurrant (blech!) I want grape!! :0) Anyone who wants to bring or send me American Skittles or Starbursts would be my friend forever!  
Emma and Mr. Knightly from the 2009 TV adaption
H is for Husband: My very own Mr. Knightly (Jane Austen’s Emma) I sometimes wonder if I should refer to him as Edward Ferrars because I tend to relate to Elinor Dashwood best of all Jane’s characters. But I tend to think of our relationship more like Emma’s and Mr. Knightly’s. Anyway I feel lucky to have married my best friend and cannot imagine life without him. I need him to help me eat everything I bake!!


I is for Ice cream: When I was younger I never particularly liked ice cream. Then I went to San Francisco to stay with my Aunt and Uncle, where we had Ice cream for dinner at least 2 nights out of my 9 nights there! (see: V)

J is for Janet & Stacy: My sisters. One older, one younger. No one will ever know me better then these two lovely women!

K is for Knitting: Something I still have yet to master! My resolution is to knit  4 of these before Christmas!! Considering I don’t know how to read a pattern doesn’t matter!!

L is for Logic: My logical approach to life plays havoc with my emotional side. I tend to come across as very contradictory. Makes life interesting I guess!


M is for My Little Pony: I rush to pick Mini-Baker up from pre-school so I can get back to watch My Little Pony: Friendship is Magic. I am a big geek and I don’t care who knows it!

N is for Nigella: Even if I wouldn’t cook half of what’s in her cookbooks, I admire her for being a “real” women in the media. Not too many people get away with it. Recently The Daily Mail were giving her crap for losing weight because she has always said size doesn’t matter. She’s right it doesn’t. If she has lost weight that’s her choice and I still like reading and watching her! (see: S)

I met Nigella at a book signing for Kitchen in 2010!
O is for Obsession: I have lot’s of them!! Nothing too crazy, I just get a little carried away when I decide I like or enjoy something. (see: A, B, C, I, M, R, and this post and this one)

P is for Pies: I made an awesome Coconut Cream Pie once. Not a lot of experience there. Like Knitting it’s something I want to try and master! Master Pie Maker, a title I’d like to add to my resume/CV!!

Q is for Quiet: Not something I get a lot of these days with 2 kids, but then in the same turn my life has slowed down since we made the decision to have me stay at home with them. I would say we live a relatively quiet life. 

my baking books

R is for Reading: Reading as in books, not where I live! :0) I love books of all kinds!! Check out my bookshelf tab at the top and my other blog that I write with my sisters! (See J)

S is for Slimming World: I have never been a skinny minny, but after having babies it went from bad to worse. I have been a member since September! Had a little gain over Christmas, but getting back on track in the new year! I would recommend Slimming World to anyone as it’s an easy way to change your life style eating foods you like!

T is for Text vs Talking: Text is good for quick messages. Messages that inform the recipient of your where abouts or if you have a non-urgent question. It is however the most annoying form of communication as I much rather Talk to the person. It’s a shame that in a world full of amazing ways to communicate we are losing the one that matters most.

U is for United: United States of America, United Kingdom, United Cakedom. All three play an important role in my life. Where I’m from, where I live, and where I spend most of my time!!


V is for Vanilla: Love it!! It tastes good on it's own and it pairs with so many other flavours beautifully how could you not like it??

W is for Waffles: I miss my Dad's Waffles. I've not found a proper waffle maker here in the UK. I must have another look for one!! Waffles are good.


X is for miXer: My mother-in-law gave me her Kenwood Chef miXer this past Christmas. It’s so nice to make icings with! Makes baking easier!!

Y is for Yummy: My goal this year is to make as many Yummy things as possible to share with everyone!! I would love to see what you make too! (see: contact tab)


Z is for Zodiac: I am a believer. I’m not saying I use it to guide my life! I mean my husband is a Libra and I’m a Taurus a very bad match!! We have things in common, but nothing to sustain a relationship according to everything I’ve ever read on the topic. We’ve been married for 7 years in April!! But I do think I fit the profile of a Taurus and my Chinese Zodiac, The Pig.

resources: skittles picture came from here; vanilla picture from here; kenwood mixer picture from here; zodiac pics come from here and here. Links removed due to them being unavailable.
note: I am only a slimming world member and am not getting paid to advertise it is my own thougts and opinion! 

Vanilla Slice

While browsing in my local Oxfam book store I came across this little book called Cakes and Slices published by Murdoch Books. It's where I found the recipe for these Vanilla Slices. This recipe was 1-of-3 that featured passion fruit. Ever since I had that cheesecake at Giraffe I have wanted to use passion fruit in my baking and this is the second time I have! It's so good.

This didn't work out as I wanted, it was doomed from the start. First off I wasn't really in the mood to bake, but I bought all the ingredients and didn't want anything to go off. Then I realised I bought the wrong amount of whipping cream. I thought I had read 35mls, but it was 35floz! oops. So, I substituted with double cream and milk. It worked but it took way longer then the 2 minutes it says it should. I ended up burning it. The burnt taste wasn't completely inedible, just not what I wanted. I also blame my NOT heavy bottom sauce pan. Too bad I already used all my Lakelands gift vouchers!

Then I used ready-made puff-pastry as I don't have a lot of experience in pastry making and I wanted to save time. I don't think I baked it long enough. It was baked, but could have been more browned.

I went ahead with the icing, but it had a strong taste of icing sugar, the passion fruit wasn't enough to over power it. So, it was only okay. I might have to play with that icing a bit as I really like the idea of a passion fruit icing!

These slices were a bit better the following day after cooling in the fridge over night. The burnt taste wasn't as noticeable and it was very creamy and made me decide to try these again at a later date!

To compensate for the not so successful vanilla slice I used a tried and trusted back up! Betty Crocker Fudge Brownies! I wondered why I sometimes preferred these brownies to other homemade versions I have made/tried. It's the oil. It has to be. All the other recipes use butter. This one calls for 2 tbsps of vegetable oil. Either way they were good.
chilled and ready to eat

500g ready-made puff pastry
230g caster sugar
90g corn flour
60g custard powder
1 litre pouring cream
60g unsalted butter
2 tsp vanilla extract
3 egg yolks
Icing: 185g icing sugar, 60g passion fruit pulp, 15g unsalted butter

Preheat oven 210C. Lightly grease 2 baking sheets with oil. Line the base and sides of a shallow 23cm square cake tin with foil, leaving the foil to hang over the sides.
Divide the pastry in half, roll each piece to a 25cm square 3mm thick. Place on baking sheets and prick all over with a fork and bake for 8 minutes or until golden. Trim each pastry sheet to 23cm square. Put one sheet topside down in the cake tin.
Combine sugar, corn flour, and custard powder in a saucepan. Add the cream, stirring constantly over a medium heat for 2 minutes, or until it boils and thickens. Add the butter and vanilla and stir until smooth. Remove from heat and whisk in the egg yolks. Spread custard over the pastry in the tin. Then cover with the other pastry sheet, top side down. Cool.
To make the icing combine all ingredients and stir until smooth. Lift the slice out of the tin. Ice the top and leave to set before cutting with a serrated knife.


the passion fruit icing

the vanilla slice before chilling
finished product
from the book

Cookie Pizza!!


When I was little my parents moved us from Wisconsin to Indiana and away from our extended family and friends.

During a visit from our cousins, Julia and Victoria, we not only had a great time at Bible Vacation, but a great time making and eating Cookie Pizza.

Here's how to make your very own Cookie Pizza:

  • Use any cookie dough you want. Sugar Cookies are the most versatile. I used a Betty Crocker Chocolate Chip Cookie mix. Peanut butter cookies would be a good choice too. If your in the USA just buy cookie dough if you're not making it from scratch!
  • Cream cheese, 1/3 cup sugar, and 1/2 tsp of vanilla (In small bowl, beat cream cheese, sugar and vanilla with electric mixer on medium speed until fluffy.) or clotted cream. I used vanilla cream, my favourite from Sainsbury's that I always use for scones.
  • Fruit: I used raspberries, strawberries, blueberries, peaches (canned), and passion fruit.
  • or Any other topping you would want: kiwi, pineapple, blackberries, bananas; chocolate, caramel, strawberry sauce? Jam? Candy? Sweets? Seriously anything! Let your imagination go wild!!


Take your cookie dough and roll it out in a circle or square or whatever shape takes your fancy. Then spread your cream cheese mixture (cream) over cooled crust. Arrange fruit on top! Done!
This is a fun recipe for kids and adults! It's so good and you can pretend it's good for you with all the fruit!! :0) Enjoy!!


For a more specific recipe you can try here or here or here.

Chocolate Orange Obsession!!

Jaffa Cakes


Totally Chocolatey Orange Rice Krisies Squares (ltd. edt.)


Gregg's vs Krispy Kreme: Jaffa Cake Doughnut War

Terry's Chocolate Orange Brownies

Chocolate Orange Obession

Cakespy Presents Sweet Treats for a Sugar-Filled Life (a book review)

Cakespy aka Jessie Oleson is the author of the popular blog of the same title as her book: Cakespy Presents Sweet Treats for a Sugar-Filled Life. If you have been to her blog you know what sort of desserts she creates: over-the-top, extreme, sugar-filled desserts.
I'm not exactly sure how many of these recipes I will try as some of them are so sugar loaded just reading them gives me a tummy ache! But others are going to be hard to resist to try at least once!
Mini-Baker loves looking through this book as it is filled with lots of Jessie Oleson's own illustrations of Cuppie her cupcake mascot and unicorns. As a fellow artist I probably would have bought this book for the illustrations alone! Oleson also runs a retail gallery in Seattle where she sells her artwork of sweet treats!
I loved reading this book and would recommend it to anyone with a ginormous sweet tooth!!

resource: Cakespy website, amazon.com, amazon.co.uk (picture taken from amazon)

Espresso Cupcakes!!


If you are a coffee lover you could easily replace these for your morning cup of coffee!! The cake was so moist and delicious, but nothing tops the icing! I love coffee ice cream and this is exactly what the icing tastes like expect for it’s a lot more sugary! There were several recipes for espresso/coffee/mocha cupcakes, but I choose this one from Hummingbird Bakery Cake Days as I already had everything I needed in my cupboard. Maybe one day I’ll make the others to compare!

Espresso Cupcakes
240ml (8 ½ floz) milk
20g (3/4oz) instant espresso powder
80g (3oz) unsalted butter, softened
280g (10oz) caster sugar
240g (8 ½ oz) plain flour
1 tbsp baking powder
¼ tsp salt
2 large eggs (extra large for USA residents)

Pre-heat oven 190C/375F/gas mark 5. Prepare your muffin tin with cases.
Lightly warm the milk, without boiling, and dissolve the espresso powder in it.
Beat the butter, sugar, flour, b.powder, and salt on a low speed until the consistency resembles fine breadcrumbs.
Whisk the milk mixture and eggs together.
Pour 3-quarters of the mixture into the dry ingredients combine on a low speed.
Increase speed to medium until smooth and thick, pour in the rest of the milk mixture and mix until smooth.
Fill your muffin cases ¾ full and bake for 18-20 minutes


frosting:
50ml (1 ¾ oz) whole milk
16g ( ½ oz) instant espresso powder
500g (1lb 2oz) icing sugar
160g (5 ½ oz) unsalted butter, softened

Like before, slightly warm the milk and dissolve the espresso powder and set aside to cool completely.
Using an electric whisk or freestanding mixer with the paddle attachment on a low speed combine the icing sugar and butter until sandy in consistency.
Slowly start to add the milk mixture, once it’s all mixed in increase speed to high until light and fluffy.


Spread or pipe your icing onto your cooled cupcakes and decorate as you wish with chocolate-coated coffee beans or as I did. I shaved a chunk of Green & Black’s Dark Espresso Chocolate on top of my cupcakes.