Showing posts with label brownies. Show all posts

The Only Brownie Recipe you will ever need! (Raspberry & Toffee Brownies)


I have been blogging for a long time and at one point it was almost an obsession. But blogging was easy because I loved everything to do with what I was blogging about - baking.

I still enjoy baking and I still love reading cookbooks - it's why you still see quite a few book reviews on here - I even enjoy writing and taking photos, but my life now has limited extra time for those things, I have different priorities, hence why my frequency of posts has dropped so dramatically.


The one thing I don't enjoy is the stress and anxiety of social media. So, I have found a platform I enjoy (instagram) and use it as and when I get an opportunity I go on twitter and facebook and update things, but I no longer stress about how many likes or retweets I get.

I was asked once why I blogged and I answered mostly for me. And for my love for baking, reading, writing, photography etc.... blogging was and is my creative outlet and if I get a few loyal readers or lots of people dropping by great! But it's not why I blog.

The internet is a hard place to live in and understand.


These brownies are a recipe that I have tried and tested over and over again and thankfully aren't that hard to understand. I originally got this recipe from a BBC Good Food Magazine and the other day I opened up one of their issues and it was in there again, because it is literally that easy and good.

It has been adjusted over and over and to be honest this batch of brownies I couldn't even tell you what I put in them exactly. I just sort of threw it all together. But if you want to throw a batch together this is how you could do it.


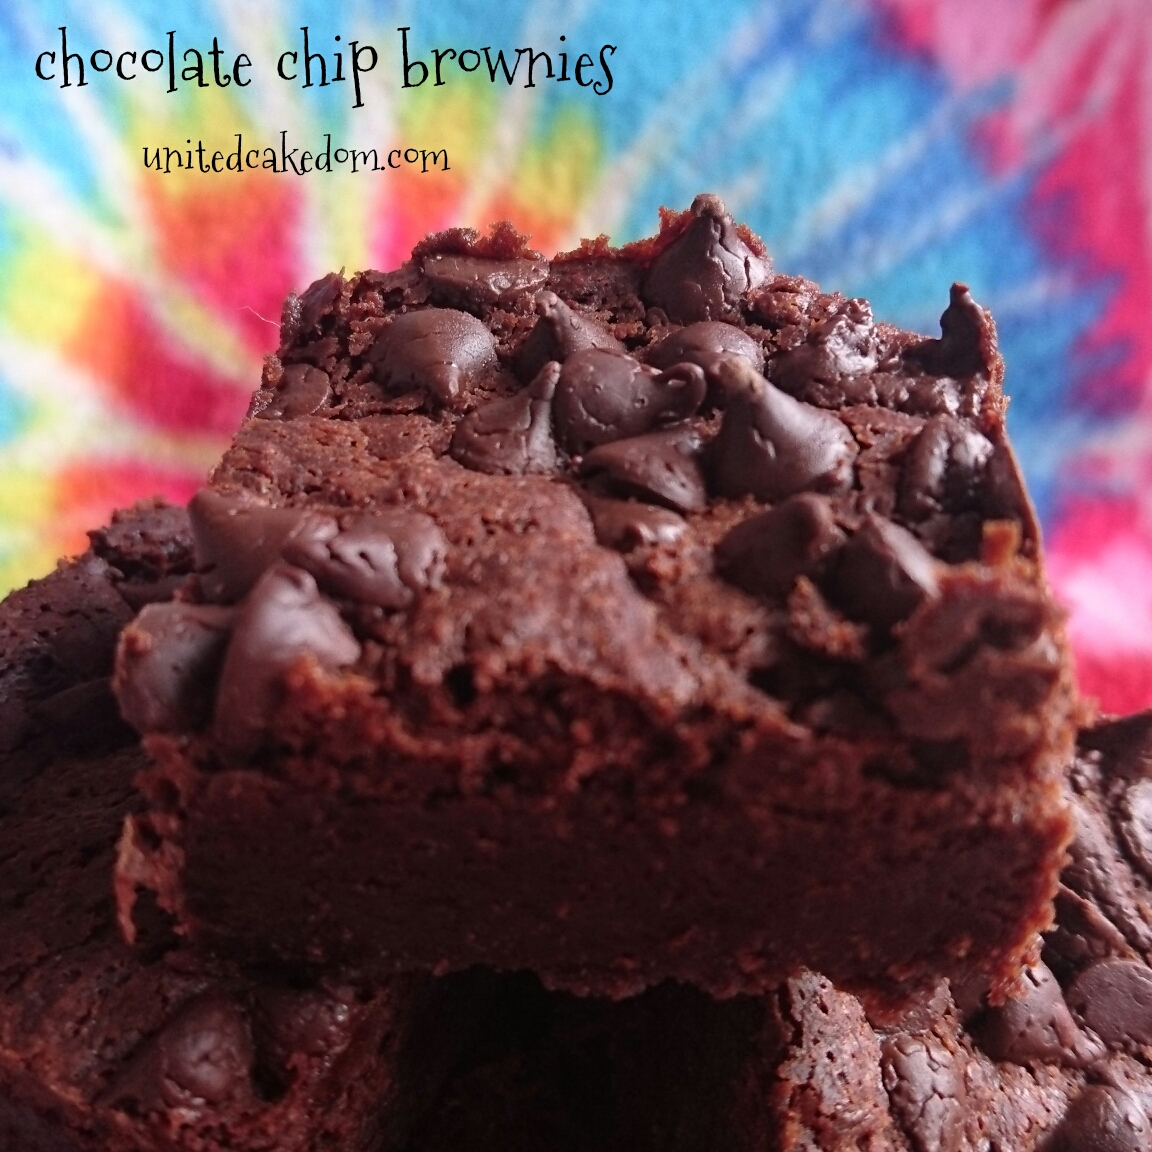
Brownies: raspberry & toffee

200g dark chocolate chips
100g milk chocolate chips
250g salted butter
250g light brown sugar
150g dark brown sugar
4 large eggs
140g plain flour
45g cocoa powder
10g espesso powder
100g fresh raspberries
100g toffee, chopped

Preheat oven to 180C/gas4 and line a brownie pan or 8in square pan with parchment paper.
Very gently melt both chocolates with the butter and sugar in a medium saucepan. Just before the chocolate is completely melted, take off the heat and gently stir until it’s completely melted.
Then add the eggs one at a time to the melted chocolate mixture. Sift the flour, cocoa powder and espresso powder into the pan and stir until just combined.
Gently fold about half of the raspberries and toffee into the mixture, pour into the prepared pan and sprinkle the remaining raspberries and toffee over the top.
Bake in the pre-heated oven for a minimum of 35 minutes. If you are using the 8 inch square pan you may want to give them an extra 5 minutes, if you are using a brownie pan or a 9 inch pan then I would still closer to the 35 minutes.
Cool completely before cutting into squares and eating!


As mentioned the original recipe was not mine own, however this recipe only resembles the original, as was modified to fit what was in my cupboards! 

If try these out let me know how you adjust them in the comments below, I am always looking for ways to make the different! 

Here are a few of the adjustments I have made over the years: (Each one is linked to the relevant post if you want to see pictures!)

Ferrero Rocher Brownies


OMG right? 

I have to admit that these were not of my creation, but come from a creative youtuber Cupcake Jemma. I love watching her videos and if you haven't before you should start with the video I have linked below! These brownies again wouldn't have been my first choice as I am not a fan of hazelnuts. They aren't terrible, just not a huge fan. 

However, my baby baker, not a baby any more having celebrated her 8th birthday last week, likes them and loves Nutella even more. Something I discussed a few posts ago when I made Nutella brownies and since I only just made them I couldn't make them again. 


So, on the hunt for what else I could make her I came across great recipes featuring Nutella like 
Nutella Bueno Cupcakes from The Baking Explorer and an Ultimate Chocolate and Nutella layer cake from supergolden bakes and I also came across a No-bake Ferrero Rocher Cheesecake from What Jessica Baked Next. It was this last one that made me think of Ferrero Rochers and went on another hunt before coming across these brownies from Cupcake Jemma. 

They turned out beautifully (please ignore my cracked ganache) and were loved by all who tried them! If you'd like to have a go I have listed the ingredients you will need, watch the video for instructions and I made some notes on what I did differently below it. Enjoy!! 


Ferrero Rocher Brownies

2 small eggs
165g caster sugar
80g dark chocolate
80g unsalted butter
25g cocoa powder
60g plain flour
1/4 tsp baking powder
1/4 tsp salt
30g chopped roasted hazelnuts

Nutella Nougat
25g unsalted butter
100g caster sugar
30ml evaporated milk
40g nutella
100g marshmallow fluff
60g chopped roasted hazelnuts
1/4 tsp vanilla extract

for the topping
75g double cream
75g dark chocolate
8 or more Ferrero Rocher


There were a few things I changed to suit my needs: first I made them in a 7inch circle cake tin as I wanted it to be cake like for my daughters birthday. Because of this I cooked it for 25 minutes instead of the 15-20 that she suggests in the video. However, that could be because of my oven so if you too are making them in a round tin then check them at 15 minutes. 

Second I didn't pipe more Nutella in the nougat. Just an extra step I couldn't be bothered with, but would totally be worth it if you are a Nutella fan! 

Third I didn't decorate with more hazelnuts and gold lustre although I wish I had as my ganache cracked a bit. That was only because I was impatient and didn't let it all sit before taking it out of the tin. 


*Want to see more of Cupcake Jemma's delicious treats? Follow the video above or visit her website here


Nutella Brownies


There is a hashtag that exists in the social media world that allows people to express their unpopular opinion. The hashtag is #unpopularopinion - surprise!

And once a blue moon ago I used this hashtag to express my unpopular opinion on Nutella. I don't like it. I don't like praline either or hazelnuts in general. There were others who agreed with me, but mostly I had distain! How could I not like Nutella? And I get it I mean I don't understand how people can't like peanut butter. But those people do exist! 

Then why have I made Nutella Brownies I can see you asking!! Because I have a 7 year-old who loves the stuff and if I let her would eat it every day for breakfast lunch and dinner. And since I love her so much I obliged. 


Sometimes when a new year starts I think of one word I would like to sort of vaguely define my year to come and I think oblige should be that word. Not in the binding legal way, but in the do someone a favor or assist them or meet the wants/needs of someone else. And also not in a compromising my own beliefs and values and stuff way ya know.... spreading more love one disgusting Nutella Brownie at a time!

(Note, I am only one of few who didn't like these. The said seven year old loved them, my neighbors,  and Santa enjoyed them too. And if you like Nutella then you will probably love them as well.)


Nutella Brownies

300g semi-sweet chocolate chips (or 300g mixed milk/dark chocolate)
250g salted butter
400g light brown sugar
4 large eggs
140g plain flour
50g cocoa powder
200g Nutella

Preheat oven to 180C/gas4 and line a brownie pan or an 8in square pan with parchment paper.
Very gently melt the chocolate with the butter and sugar in a medium saucepan. Just before the chocolate is completely melted, take off the heat and gently stir until it’s completely melted.
Then add the eggs one at a time to the melted chocolate mixture. Sift the flour and cocoa powder into the pot and stir until just combined.
Pour into the prepared pan and dot the Nutella over the top of the brownie batter. Use a knife to swirl the Nutella through the batter. Bake in the pre-heated oven for a minimum of 35 minutes. Depending on your pan size and oven add an extra five minutes if need be. Cool before cutting into squares and sharing with loved ones or if you are a Nutella lover keeping them all for yourself!

 Just like this! 

Brownie batter is so shiny and pretty.
Then after baking they look like this: brown squares that are hard to photograph. I try. 

One Pot Peanut Butter Brownies


When I first moved to the UK when I talked about peanut butter people were like "eww." It was rare for me to come across a single soul who loved peanut butter as much as me. Then I start this new job and I have at minimum 4 co-workers who absolutely love peanut butter.


The fact they love it as much as I do gives me the perfect excuse to bake with peanut butter. Since we've had a bit of a stressful time of it the last couple of weeks I thought I'd do just that. What goes well with peanut butter? Chocolate! It is my strong opinion that the best baked chocolate treat is the brownie.

I have made a lot of batches of brownies in my baking career and I always come back to this recipe. They are super easy to make as they are made in one pot or saucepan if you want to be pedantic. I generally keep the ingredients in my cupboards for brownie making emergencies! Brownies solve a lot of problems. It's true.

So, if you have problems that need to be solved or co-workers who love peanut butter make these!!


Peanut Butter Brownies

150g dark chocolate, broken up
150g milk chocolate, broken up
250g salted butter
400g light brown sugar
4 large eggs
140g plain flour
50g cocoa powder
150g smooth peanut butter

Preheat oven to 180C/gas4 and line a brownie pan or an 8in square pan with parchment paper.
Very gently melt both chocolates with the butter and sugar in a medium saucepan. Just before the chocolate is completely melted, take off the heat and gently stir until it’s completely melted.
Then add the eggs one at a time to the melted chocolate mixture. Sift the flour and cocoa powder into the pan and stir until just combined.
Pour into the prepared pan and dot the peanut butter over the top of the brownie batter. Use a knife to swirl the peanut butter through the batter. Bake in the pre-heated oven for a minimum of 35 minutes. Depending on your pan size and oven add an extra five minutes if need be. Cool before cutting into squares and sharing with friends, family, and co-workers!


Adventures in the Kitchen - with Panasonic!

If you had invited me over for a meal and told me that you were going to cook all of it in a microwave I would have assumed you were cooking me beans on toast.

And if you only owned a basic microwave I am sure that is exactly what I would have gotten, but there are so many different kinds of microwaves these days! Maybe they always existed and I have just been enlightened by the existence of the variety of microwaves out there? It now is clear of why they are sometimes called microwave ovens.


Either way I went for lunch at the Panasonic Ideas Kitchen and I was served a meal prepped by us and cooked in microwaves.

We had roast beef, focaccia, chopped salad, lemon drizzle cake, dulce de leche brownies and freshly juiced juice all cooked in microwaves except the juice and salad of course.


I was pleasantly surprised at how good the beef turned out. To be completely honest I was extremely skeptical of the beef. I needn't have been because it was perfectly cooked and tasted great! The bread dough was proved in a bread machine and then rolled out and proved a second time in a microwave oven at a low heat before being baked in the same microwave oven.

Salad was chopped using a food processor and had a gorgeous basic dressing of olive oil, mustard, and seasoning. The juice was very experimentally made and had a bit too much ginger. We whipped up the lemon drizzle cake and chocolate brownies and both were cooked in the microwave ovens as we had lunch.

Especially in England where space is crucial I wouldn't mind having a multi functioning microwave ovens. It would be nice for no thinking cooking after a busy day and it would especially be useful when making a big meal like Christmas dinner.


Learn more about the products here!
Microwave Oven: NN-DS596B
Food Processor: MK-F800SXE
Slow Juicer: MJ-L500
Hair Dryer: EH-NA65
Hair Straightener: EH-HS95

I listed two none foodie gadgets because before we went into the kitchen I had my hair washed and blow dried in the salon across the hall .... I know right? This place is amazing. Think I might just move in! My hair always looks great when someone else straightens it. I have sort of given up on straightening my hair, but now I remember how great it looks!


And a last last note before I go, we were given goodie bags and mine contained my very own slow juicer!! So, stay tuned for more on that as I get my juice on!


*I was invited out for the day, all opinions are my own!

The Traveling Oreo Brownies


Summer finally arrived and then it went again just like that. Luckily before it went my friend and I made a trip to London to visit the Tate Modern when it was still sunny. It is my favorite museum in all of London, because to me modern art is the most expressive and interesting. Don't get me wrong, my university professor Kyle Crocker taught me to appreciate all art in all it's forms, but I like art that says something even if I don't agree with what it's saying.

I have been to the Tate Modern many times and there is always something new to see! There are always new exhibitions, but the art that has been there since it's opened is different every time I see it. It's like a book or a movie that speaks to you differently at different points in your life.

However, this time there was actually something new to see! The Switch House has been rebuilt with a 10 story tower and loads of more gallery space. As we were exploring this new space we must have looked a bit lost because a security guard stopped us and asked if she could help. She asked if we had been to the 10th floor yet, we hadn't. She instructed us to go up there right away and to come back and tell her what we thought after we'd seen the view.


Of course it was amazing, London always looks amazing from the sky. Here at the Tate the view is free and you can go whenever you want! The Shard and London Eye charge for the view and where the Sky Garden is gorgeous and free you have to plan the trip in advance and book tickets.

To make our trip even more cost effective we packed our own lunches. Neither of us were interested in playing the game of where to eat. It's a game we both despise. So, to accompany us on our day out I made my favorite brownie recipe and added some chocolate creme Oreos to them, because when you are going for chocolate you might as well go all out right?

They were great and added the sugar boost we needed after an an exhausting day of being cultured!


Chocolate Creme Oreo Brownies

100g dark chocolate, broken up
200g milk chocolate, broken up
250g salted butter
400g light muscovado sugar
4 large eggs
140g plain flour
50g cocoa powder
1 pkg (154g) chocolate creme Oreos

Preheat oven to 180C/gas4 and line a 9in square pan/tin with parchment paper. Line approximately 9 Oreos on the bottom. I didn't want mine touching so spaced them out a bit. But line them up however you want! Crush the remaining Oreos until they are crumbs of varying sizes.
Very gently melt both chocolates with the butter and sugar in a medium saucepan. Just before the chocolate is completely melted, take off the heat and gently stir until it’s completely melted.
Then add the eggs one at a time to the melted chocolate mixture. Sift the flour and cocoa powder into the pan and stir until just combined. Stir in about half of the Oreo crumbs.
Gently pour the mixture over the Oreos and sprinkle the rest of the crumbs over the top before baking in the pre-heated oven for 40-45 minutes.
I suggest baking them until more firm if you are taking them on a picnic, less if you want a gooey brownie.


Oh, and we did see the security guard again in another gallery and we told her how very impressed we were with the view! The piece of art that spoke to me this visit: Ibrahim El-Salahi 'Reborn Sounds of Childhood Dreams I' 1961–5

Tate Modern: Bankside, London, SE, United Kingdom

notes: this post is not sponsored in anyway by either the Tate Modren nor Oreo people for more information please see my contact/policy page! Recipe is adapted from Bakes & Cakes Magazine Summer 2013 (BBC Good Food Mag).
Other brownies I made using variations of this recipe: Snicker Stuffed Brownies, Twix Brownies, and Chocolate Chip Brownies!

Snicker (stuffed) Brownies


You are only as old as you feel.

One of those sayings that is suppose to give hope to people who are afraid of getting old that if you are 50 odd it doesn't matter if you still feel 25! However, there are times that it could mean the opposite. I am going to be 33 in about a week and right now at the moment I feel like I'll be turning 53! Maybe 103?

I feel like I've lived a million lifetimes and I could do with a good nap.

Then after my nap I'll get up and binge watch the new series of TMNT with my girls, maybe thrown in a bit of My Little Pony Friendship is Magic and feel about 8 again!

Anyway, May is a busy month of birthday's not only do I have a May birthday it was a good friend's birthday last week. He loves Snickers and I had all these ideas and thoughts on how I was going to make him a Snicker like cake.

Then I just thought you know what brownies taste great with chocolate bars in them so that's what I did and I was right. It's not very often that happens, me being right about something, especially at the moment, but this time I can definitely say I got it right.

I have made these brownies a million times in a million different ways and they have turned out great every time. The recipe originated from a special edition of a Good Food magazine a few years back and the caramel sauce comes from the Outsider Tart Baked in America cookbook.


Snicker (stuffed) Brownies: 

150g dark chocolate, broken up
150g milk chocolate, broken up
250g salted butter
400g light muscovado sugar
4 large eggs
140g plain flour
50g cocoa powder
8 Snicker bars

Preheat oven to 180C/gas4 and line an 8in square pan with parchment paper. Line the 8 Snicker bars on the bottom. I didn't want mine touching so spaced them out a bit. But line them up however you want!
Very gently melt both chocolates with the butter and sugar in a medium saucepan. Just before the chocolate is completely melted, take off the heat and gently stir until it’s completely melted.
 Then add the eggs one at a time to the melted chocolate mixture. Sift the flour and cocoa powder into the pan and stir until just combined.
Gently pour the mixture over the Snicker bars and bake in the pre-heated oven for a minimum of 35 minutes. As these are bit fatter they may need an extra five minutes. Up to you though! Leave to cool as you make the caramel sauce.


Caramel Sauce
225g sugar
120ml water
120ml double cream
60g butter
100g salted peanuts, chopped

Combine sugar and water in a heavy saucepan. Gently whisk before placing the saucepan on a low heat. Once it is on the heat it is important you do not stir it. Swirling the pan is okay, just don't put a spoon in and stir. As the mixture heats brush with a wet pastry brush to remove any crystals that have formed. 
When making caramel it's important to stay close by as it go from clear, to a beautiful amber color, to burnt in a matter of seconds. I suggest keeping it on a low heat which means it can take about 20 minutes or so. Once the mixture takes on an amber/caramel color take it off the heat and add a little bit of the cream and whisk it in. It will bubble up so be careful! Then continue to whisk the cream in little by little until combined. Add the butter and whisk until smooth. Cool slightly before pouring on top of the cooled brownies. Sprinkle over the chopped peanuts and leave to cool in the fridge for about an hour.


For more treat filled brownies check these out: 

Rolo Brownies from Penne For Your Thoughts
Peanut M&M Brownies from Emily's Recipes and Reviews 
Rolo Stuffed Brownies from Supper in the Suburbs 
Slow Cooker Crunchie Brownies from BakingQueen74
Caramel Egg Brownies from Lovely Appetite 

Chocolate Chip Brownies - Inspired by That 70's Show


One of my favorite shows of all time is That 70’s Show and now it’s on Netflix. I binged and finished all 8 seasons in a few weeks. See when it was on I only made it to about season 5 before I stopped watching due to real life commitments - like university, part -time job, participating in my sorority and hanging out … down the street.

I think the reason I love the show so much is that I relate to it. It reminds me of my life between the ages of 15-18. My parents had moved us to a small remote town in northern Minnesota. Where it was cold and not much to do.

We did what Eric, Donna, Hyde, Kelso, Fez, and Jackie did we literally hung out down the street! We had to make our own fun running around town or hanging out at each others houses hosting movie nights.


We all had crappy part time jobs and drove cars from the 70’s and 80’s and in winter would pull donuts on the frozen river and in the summer “cruised the dubs.” The Dubs was short for double as in double lanes - there was one road that had double lanes. All part of spending your teenage years in a small town.

I can’t go back to being in high school and I’m not so sure I’d really want too, but I don’t mind having flashbacks through a well written TV show! Kitty was always baking from scratch and one of the things we saw her bake over and over was brownies!

In the last season she baked them for Jackie to win over her boss (Mary Tyler Moore) and was very upset when Jackie took the credit. It was after watching that episode I had a craving for brownies and made them the next day!

I’d like to think these brownies would have passed Kitty’s approval! It’s the only brownie recipe I use these days and this time time I added chocolate chips to it! If I were Hyde I would have added a different “special” ingredient!


Chocolate Chip Brownies

300g dark chocolate, broken up
250g unsalted butter
400g light muscovado sugar
4 large eggs
140g plain flour
pinch of salt
50g cocoa powder
100g chocolate chips

Preheat oven to 180C/gas4 and line a brownie tin (8x11) or an 8in square pan with parchment paper.
Very gently melt the chocolates with the butter and sugar in a medium saucepan. Just before the chocolate is completely melted, take off the heat and gently stir until it’s completely melted.
Then add the eggs one at a time to the melted chocolate mixture. Sift the flour, salt, and cocoa powder into the pan and stir until just combined.
Then pour the mixture into the prepared tin/pan. Scatter all the chocolate chips over the top of the brownies before baking in the preheated oven for 35 minutes. If you want them a little gooier only bake them for 30 minutes.
Cool completely before cutting into squares. They are good for 3 days in an airtight container not that they will last that long!


notes: recipe is adapted from a recipe in Bakes & Cakes Magazine Summer 2013 (BBC Good Food Mag) - If you haven’t seen That 70’s Show I highly recommend watching it! The image I used of the cast comes from this website, I doubt they own it, but I thought I'd link anyway! I used milk chocolate chips to help cut through the dark chocolate, but use whatever suits you!

Aduki Bean Brownie Bites from Superfoods 24/7 by Jessica Nadel {book review}

When I was offered to review Superfoods 24/7: Delicious Recipes for Superfoods at Every Meal I said "No thank you." Mainly because I was judging it by it's cover and didn't think it would be a good fit for my blog.

The lovely publisher's PR lady suggested I take a look anyway because she really felt it would be a good fit, especially if I liked Whole Food Energy. So, I agreed and I'm glad I did.

Starting with all the facts on the superfoods as well as giving some basic skill information, the author Jessica Nadel, gives us suggested meal plans consisting of breakfast, lunch, snack, dinner, and dessert.

We are then given mouth watering recipes for Smoothies and Breakfasts, Salads and Soups, Sides and Small Bites, Main Meals, followed by Cakes and Desserts which I have to say has many tempting recipes! I'm not going to lie I went straight to that last chapter before reading the others. I knew pretty much right away I wanted to try the Adzuki Bean Brownies. 

There was a little research involved because I couldn't find adzuki beans and realised they are the same as aduki beans which I could find. The brownies turned out really fudgey and as it uses coconut oil and cinnamon taste of coconut and a hint of cinnamon. In my opinion that's a good thing. I was a little dubious using flaxseed "eggs," but I didn't need to worry. 

The only thing I had to adjust was the cooking time. It says to bake for 10-12 minutes, but after 12 minutes they were still very much a liquid. The edges had barely started to bake. So, I left them in for another 12 minutes before taking them out and leaving to cool. They were still so gooey they couldn't be put on a cooling rack, so I placed them on a plate and put it in the fridge to cool. Also you might want to make the Flax Egg before starting with everything else. 


Aduki Bean Brownie Bites

1x400g or 410g can of aduki beans, drained and rinsed
40g cocoa powder
25g ground walnuts
60ml coconut oil, melted
100g coconut sugar
1/2 tsp bicarbonate soda
1/2 tsp salt
1/4 tsp cinnamon
2 flax eggs (see below)

Heat the oven to 180C - very lightly grease a 24-hole mini cupcake pan. Place all the ingredients into a food processor and pulse for about 2 minutes until everything is combined and smooth. Scrape down the bowl when necessary. Each 'hole' will take a heaped tablespoon of batter. Bake for 12-24 minutes. Leave to cool in the pan for 5-10 minutes before transferring them to a plate and putting them in the fridge to cool. 

Flax Egg: for 2 eggs as there recipe calls for
2 tablespoons of ground or milled flaxseed
6 tablespoons of water

Mix together and leave to stand for a minimum of 10 minutes. The mixture should go gloopy like an egg. Give it a stir before adding to the food processor.  


Before I go here are 4 recipes I can't wait to try out:


Udon Soup with Broccoli, Kale, and Sweet Potato


Quinoa Sushi Hand Rolls


Sundried Tomato and Coconut Quinoa Burgers


Minty Matcha Nanaimo Bars


notes: Superfoods 24/7: Delicious Recipes for Superfoods at Every Meal by Jessica Nadel was sent to me to review by the UK publishers; Apple Press - Available online, from the publishers, and from all good booksellers now! No other compensation was given. All opinions are my own please see my contact/policy page for more information. 

Five Ways to Use Betty Crocker Box Mixes {five on Friday}


Recently I was sent a variety of Betty Crocker box mixes to use in my baking. Every time I make something with a box mix I am worried about those “only from scratch” bakers getting on my case. However, I do use a box mix from time to time and have written about it on United Cakedom several times before.

There are a couple of reasons why I, an avid baker, would choose a cake mix. First there is very little you can do to mess it up and therefore is a good choice when in a pinch. Secondly cakes made from box mixes always turn out fluffy and soft and taste good so make great bases for special toppings or fillings.

Besides all that there are other ways to use cake, brownie, or cookie mixes and here are my five favorite ways: 


Bundt Cakes:

Using a stylish baking tin is always a way to dress up you cake mix. To Make: Follow the instructions on the box and add a 150g or a ½ cup of peanut butter to the batter. Make sure that the bundt is properly greased and floured before baking. Bake time will be a little longer then the time on the box, but it depends on shape and your oven. So, set the timer for the suggested time. Check the cake and if it’s not cooked add another 10 minutes, if it’s still not cooked add another five and continue adding five until it’s completely done. Use the skewer test to be sure. Leave to cool in the bundt pan for at least 10 minutes before gently tapping it out. Then glaze it! For a Peanut Butter Glaze (pictured): Whisk 250g/1 ½ cups icing sugar, 60ml/ ¼ cup milk, 75g/ ¼ cup peanut butter, and  ½ tsp vanilla extract together until combined. Pour over the top of the cake. Sprinkle 1 or 2 squares of dark chocolate very finely chopped over the top.


Cupcakes:

This is one of those obvious reasons, but cupcakes are always a crowd pleaser and there is so much to make cupcakes fancy or fun! I made these on my recent visit to my parent’s house in America. I used a Betty Crocker Red Velvet Cake Mix to make cupcakes and stuffed a limited edition Red Velvet Oreos in the middle before topping with a Cookies and Cream Frosting. To Make: make the cake batter according to box instructions. Fill the bottom of each cupcake case with a tablespoon of batter, then place an Oreo on top of the batter in each case, top each Oreo with the rest of the batter (about 3-4 tablespoons). Crush up any leftover Oreos and mix in the frosting for a delicious cookies and cream frosting! note: Since these Oreo’s don’t exist here in the UK feel free to use regular Oreos in any flavor cake!


Red Velvet Brownies:

These make a more cake like brownie, but are chewier which is how I like them! To Make: Heat the oven to 180C/350F; line a square tin with grease proof paper. Mix 1 box of red velvet cake mix; 60ml/ ¼ cup vegetable oil (or sunflower); 75ml/ 1/3 cup water; 1 egg together until combined. Add 100g white chocolate chunks and pour into the prepared tin. Bake in the preheated oven for 30 minutes. Once cool cover with Betty Crocker’s Vanilla Icing and Rainbow Sprinkle frosting.
  

Cake Batter Cookies:

Sally’s Baking Addiction blog’s most popular post is for her Cake Batter Sprinkle Cookies. I adjusted her recipe to suit a UK market. To Make: Sift 1 (450g) Betty Crocker Classic Vanilla Cake Mix and 1 tsp baking powder into a bowl. In a separate bowl beat 2 eggs, 75ml/1/3 cup sunflower oil, and ½ tsp vanilla extract. Add the wet mixture to the dry mixture and stir until combined. Heat the oven to 180C/350F and line the baking sheet with greaseproof paper. Form one-inch balls with the cookie dough and place on the baking sheet leaving space between each dough ball. Place a few chocolate chunks in the cookie dough. Bake for 9 minutes. Don’t let the cookies go brown, take them out and let them cool on the baking sheet for a few minutes before moving to a cooling rack. They will look pale and under baked, but they will harden while cooling. note: want red velvet cookies? Use Betty Crocker’s Red Velvet Cake Mix and white chocolate chips!


Brownie Bites:

Brownies are already smooshy so they are a lot easier to make then cake pops (another great use for cake mix). To Make: Make brownies according to the box instructions. Once they are cool enough to touch break some up and roll it into about a 1-2 inch ball. Cover in melted chocolate or candy melts. Decorate however you want! Check out the time my sister made Golden Snitch Brownie Bites!(picture above)

If you like this post you might like:     


notes: cake mixes were provided for this post all opinions are my own please see above tab for further information.