Showing posts with label childhood. Show all posts

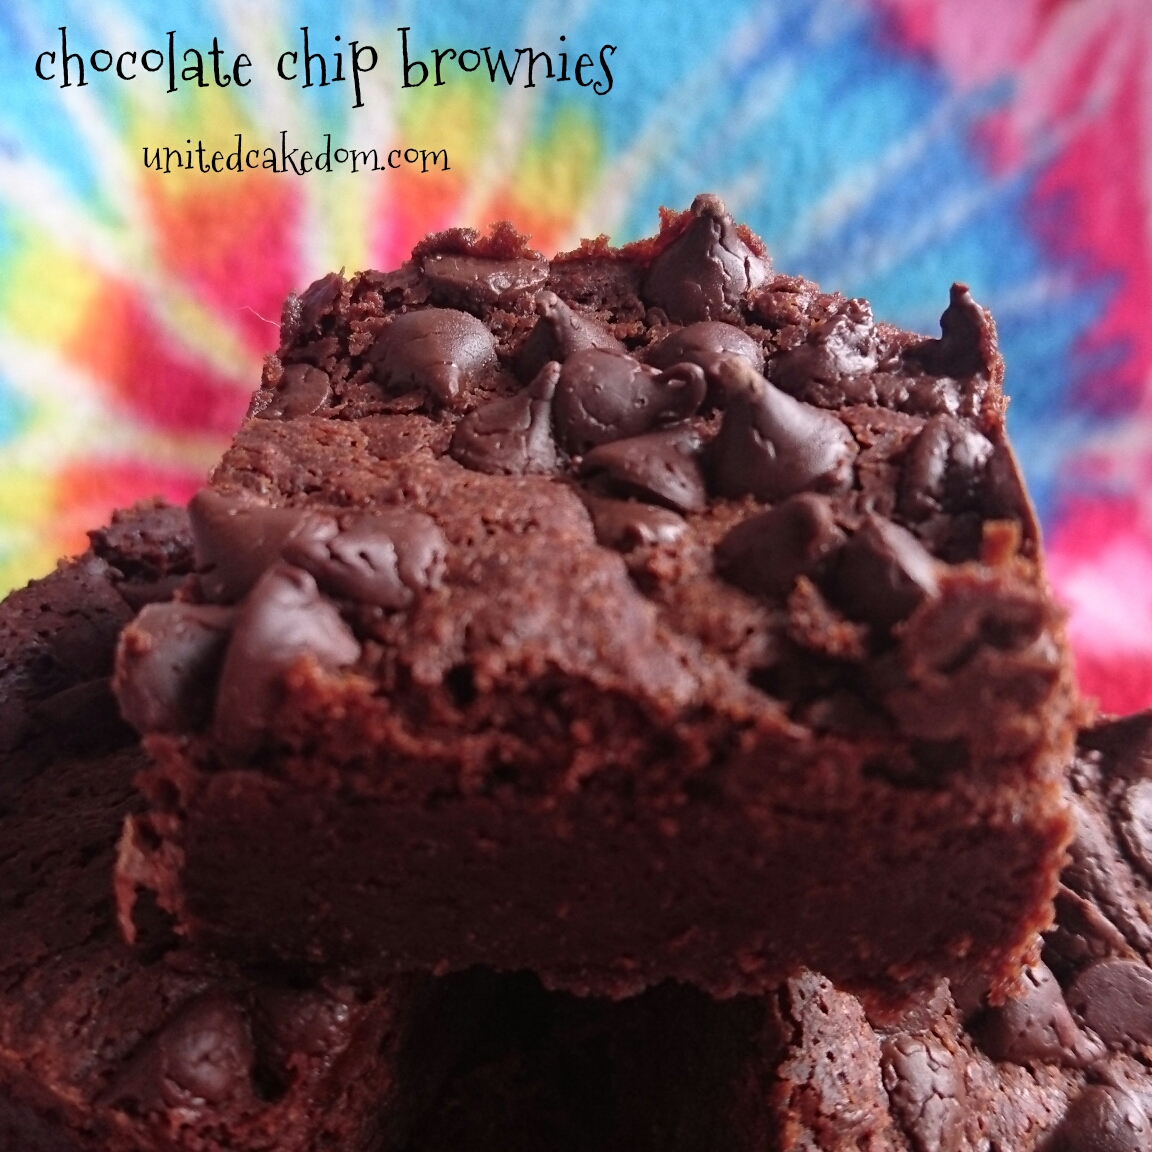
Chocolate Chip Brownies - Inspired by That 70's Show


One of my favorite shows of all time is That 70’s Show and now it’s on Netflix. I binged and finished all 8 seasons in a few weeks. See when it was on I only made it to about season 5 before I stopped watching due to real life commitments - like university, part -time job, participating in my sorority and hanging out … down the street.

I think the reason I love the show so much is that I relate to it. It reminds me of my life between the ages of 15-18. My parents had moved us to a small remote town in northern Minnesota. Where it was cold and not much to do.

We did what Eric, Donna, Hyde, Kelso, Fez, and Jackie did we literally hung out down the street! We had to make our own fun running around town or hanging out at each others houses hosting movie nights.


We all had crappy part time jobs and drove cars from the 70’s and 80’s and in winter would pull donuts on the frozen river and in the summer “cruised the dubs.” The Dubs was short for double as in double lanes - there was one road that had double lanes. All part of spending your teenage years in a small town.

I can’t go back to being in high school and I’m not so sure I’d really want too, but I don’t mind having flashbacks through a well written TV show! Kitty was always baking from scratch and one of the things we saw her bake over and over was brownies!

In the last season she baked them for Jackie to win over her boss (Mary Tyler Moore) and was very upset when Jackie took the credit. It was after watching that episode I had a craving for brownies and made them the next day!

I’d like to think these brownies would have passed Kitty’s approval! It’s the only brownie recipe I use these days and this time time I added chocolate chips to it! If I were Hyde I would have added a different “special” ingredient!


Chocolate Chip Brownies

300g dark chocolate, broken up
250g unsalted butter
400g light muscovado sugar
4 large eggs
140g plain flour
pinch of salt
50g cocoa powder
100g chocolate chips

Preheat oven to 180C/gas4 and line a brownie tin (8x11) or an 8in square pan with parchment paper.
Very gently melt the chocolates with the butter and sugar in a medium saucepan. Just before the chocolate is completely melted, take off the heat and gently stir until it’s completely melted.
Then add the eggs one at a time to the melted chocolate mixture. Sift the flour, salt, and cocoa powder into the pan and stir until just combined.
Then pour the mixture into the prepared tin/pan. Scatter all the chocolate chips over the top of the brownies before baking in the preheated oven for 35 minutes. If you want them a little gooier only bake them for 30 minutes.
Cool completely before cutting into squares. They are good for 3 days in an airtight container not that they will last that long!


notes: recipe is adapted from a recipe in Bakes & Cakes Magazine Summer 2013 (BBC Good Food Mag) - If you haven’t seen That 70’s Show I highly recommend watching it! The image I used of the cast comes from this website, I doubt they own it, but I thought I'd link anyway! I used milk chocolate chips to help cut through the dark chocolate, but use whatever suits you!

Strawberry Milkshake Cupcakes & Kids on Social Media


It's sometimes hard for me to remember my life before social media. It's also weird for me to know my girls will never a life without it. Recently they have been asking me for phones, they are 8 and 6! I felt like a right old fuddy duddy explaining to them that I didn't have a cell/mobile phone until I was 20 years old and that when I was there age cell/mobile phones weren't widely available.

They were more widely popular by the time I was 20, but I was one of the last of my friends to get a phone. I really hated the idea of people thinking they could get ahold of me 24/7 and now I live on social media sites that inform strangers of my whereabouts. What a turn around!

Myspace was a thing just as I was leaving high school and my friends in college had live journal accounts. If you had told me then that I would have stuck to writing a blog for nearly 5 years I would have thought you were crazy. I can't help but be grateful for being almost literally the last generation to grow up without Facebook, Twitter, and Instagram.

It's somewhat disturbing to me to know that my girls know what all three of those things are and I have never sat down and told them about them. We took a big step last Christmas and their grandmother bought them Kindle Fires. They love them! The first thing they did was vlog all their Christmas presents.


You read that right. They charged their Kindles and the first thing they did was video themselves showing off the rest of their Christmas presents. So, now when they bake with me they video it. Or as much as I will let them video it. They took turns videoing each other decorating the cupcakes and then when I set them up for photos they were right there with me taking pictures.

Part of me loves it and part of me is sad that it's normal for them. I like to think that I maintain a balance of online and real life for myself as much as for them. We are strict on how much time they get to spend online, playing video games, and TV. I don't keep it from them completely because it's just not the world we live in, but it doesn't have to be the end all of everything.

This half term we've been outside everyday rain or shine. Maybe a day out or just to the park, but we haven't just sat around. Early last week it was just to wet outside and to keep them from udder boredom we made cupcakes and they got to choose whichever ones they wanted!


After looking though almost every baking book I own (which is a lot - just see the tab up above (it hasn't been updated recently either so it's just an estimate of how many books I own!)) they wanted to make Strawberry Milkshake Cupcakes from the Hummingbird Bakery Cookbook Home Sweet Home.

They are super sweet! If I ever make them again, I'd probably cut some of the sugar out! However, they are super good too! They taste exactly like a Strawberry Milkshake. I didn't taste it in the actual cake so might not be necessary, but I followed their instructions.

Strawberry Milkshake Cupcakes were all the rage 3 years ago when the book was published. So, a bit behind the times, but they were so good! If you'd like to try them out here is the recipe:


Strawberry Milkshake Cupcakes

70g unsalted butter, room temperature
210g plain flour
250g caster sugar
1 tablespoon baking powder
1/2 teaspoon salt
210ml milk
2 large eggs
40g strawberry milkshake powder (Nesquik)

Heat the oven to 170C and line your muffin tin. Be prepared that this recipe makes between 12-16 cupcakes. Beat the butter, flour, sugar, baking powder, and salt together until it resembles bread crumbs. In a separate jug mix the milk, eggs, and milkshake powder together. Gradually pour in half of the liquid mixture into the dry mixture while beating continually (low speed for stand mixers.) Beat on medium for a few minutes to remove any lumps before gradually adding the rest of the liquid mixture - again on a low speed.
Fill the cupcake cases two thirds full and bake for 20-25 minutes. Use the skewer test to determine if the cupcakes are cooked through. Once baked leave in the tin to cool for about 5 minutes before removing them to a cooling rack - leave to cool completely before frosting.

frosting
500g icing sugar, sifted
160g unsalted butter, room temperature
50ml milk
100g strawberry milkshake powder (Nesquik)
mini marshmallows to decorate
paper or candy straws to decorate

Beat the butter until soft before adding a little bit of the icing sugar. Continue to gradually add the rest of the icing sugar, beat until smooth. In a jug whisk the milk and milkshake powder together. Pour the mixture into the butter/icing sugar mixture and beat on medium/high until smooth and fluffy.
Fill a piping bag and nozzle with the frosting and pipe onto the cooled cupcakes before decorating with mini marshmallows and straws!


notes: Recipe is adapted from the hummingbird baker Home Sweet Home - I reviewed the book here! They are some of my favourite books check them all out on the hummingbird bakery website!

Day Out: Free Half Term Event at Reading Museum {Doodle Tree Trail}

It's half-term! Again! Half-terms have a tricky way of sneaking up on you unexpectedly. You're busy taking the kids to school, picking them up, doing homework, and other school things and then it's half-term and you have to plan all these things! I don't know about your children, but my two are now used to a routine and struggle with not being told what to do next.


That means it's up to me to give them suggestions or to take them out! It can be hard to get out and about without spending a lot of money at the movies or indoor play centres. I went looking online at free stuff for kids to do in Reading over the half term and was directed to the museums site.

Now this event was outside, but I thought rain or shine it's a good way to get out of the house for the afternoon. There is only so much baking, crafting, and watching movies parents and children can do!

The event was called the Doodle Tree Trail: discover some extremely special trees in Reading town Centre. It sounded different and interesting so I signed us up!

We started outside of the museum with a fun activity pack that asked us not only about the trees, but included fun facts of the trees or local history!


Trees we saw: 

Hornbeam (carbines betulus)
Judas Tree (circus siliquastrum)
Mulberry (mores nigra)
Maidenhair Tree (ginkgo biloba)
Weeping Willow (sail babylonica)
London Plane (platens xhispanica)
Indian Bean Tree (catalpa bignonioides)

The crew of people who were running the tour were very friendly, informative, and patient with the children... and adults who had questions! My girls seemed to really enjoy it. At 8 and 6 they might not have taken it all in, but they liked walking around the different parts of town we rarely go too and filling out their activity packs along the way.


This tour won't be happening again, unless they get funding, but they will be leaving the activity packs and a map of the tour at the Reading Museum for anyone interested in checking it out! If anything it takes you around the town centre and shows you a bit more then just shops!

I would recommend checking it out if you happen to be in Reading and looking for something a bit different to do! Plus there is so much more to see and explore at the museum as well as hosting other free half-term events!

Find it here:
Reading Museum
The Town Hall
Blagrave Street
Reading
Berkshire
RG1 1QH


notes: all opinions are my own and in no way associated with the Reading Museum - I really enjoy local events and sharing them with my readers, for more information please see my contact/policy page.

Rice Krispie Easter Egg Nests


Most children will make or have made cereal nests using shredded wheat or cornflakes mixed with chocolate and topped with chocolate eggs for Easter. So, make something different this time! 

Rice Krispie Easter Egg Nests!

Last month I made them into hearts for Valentine's Day and now I have made them into little nests to hold chocolate eggs and bunnies! You know I don't really like the big hollow chocolate eggs, I much prefer the mini eggs because they are solid! No one wants a hollow egg, trust me!


Any excuse to make Rice Krispie treats and I am on it! Holiday's are the best excuse to make treats and Rice Krispie treats are super versatile and easy to make! They can be made into any shape you want using cookie cutters or moulds so really the possibilities are endless!

Children might have fun helping with these, but do be careful because melted marshmallows is literally hot sugar and hot sugar can burn so please be on guard. It might be easier for them to just add the eggs and bunnies! 


Rice Krispie Easter Egg Nests

55g butter
280g marshmallows
180g puffy rice cereal 
chocolate easter eggs 
mini chocolate bunnies

Melt the butter in a large nonstick pot over a low to medium heat. Add the marshmallows and stir until melted. Take off the heat and add the cereal. Stir to coat. Fill each muffin cup in a muffin tin with a small handful of the mixture press down gently in the middle to make an indentation. Will make 12-24 nests. Leave to rest for about 5-10 minutes before placing the chocolate eggs and bunnies  in the indentions leave to rest for another 10 minutes or so. 

Alternatives: Add peanut butter, cookie butter spread, or cookies to your Rice Krispie Treats or make them into hearts! Or make Chocolate Easter Egg Nests! 


notes: Inspired from Super-Quick Muffin Tin Meals by Melanie LaDue. I have entered these into this month's Treat Petite hosted by The Baking Explorer and Cakeyboi!


Teenage Mutant Ninja Turtle Cake (birthday)


My blog started out of my love for making birthday cakes for my loved ones. I still 10 years on still love making a birthday cake most of all!

Recently my girls have started watching Teenage Mutant Ninja Turtles and words cannot express how happy that makes me. I have been a fan of the Turtles since I can remember! When we moved house, back when I was 6, my dad made my sisters and I a turtle lair out of one of our moving boxes and we played in it until it fell apart! Or until that time our basement flooded.... that flood ruined all our original Batman movie trading cards. Stupid flood. 

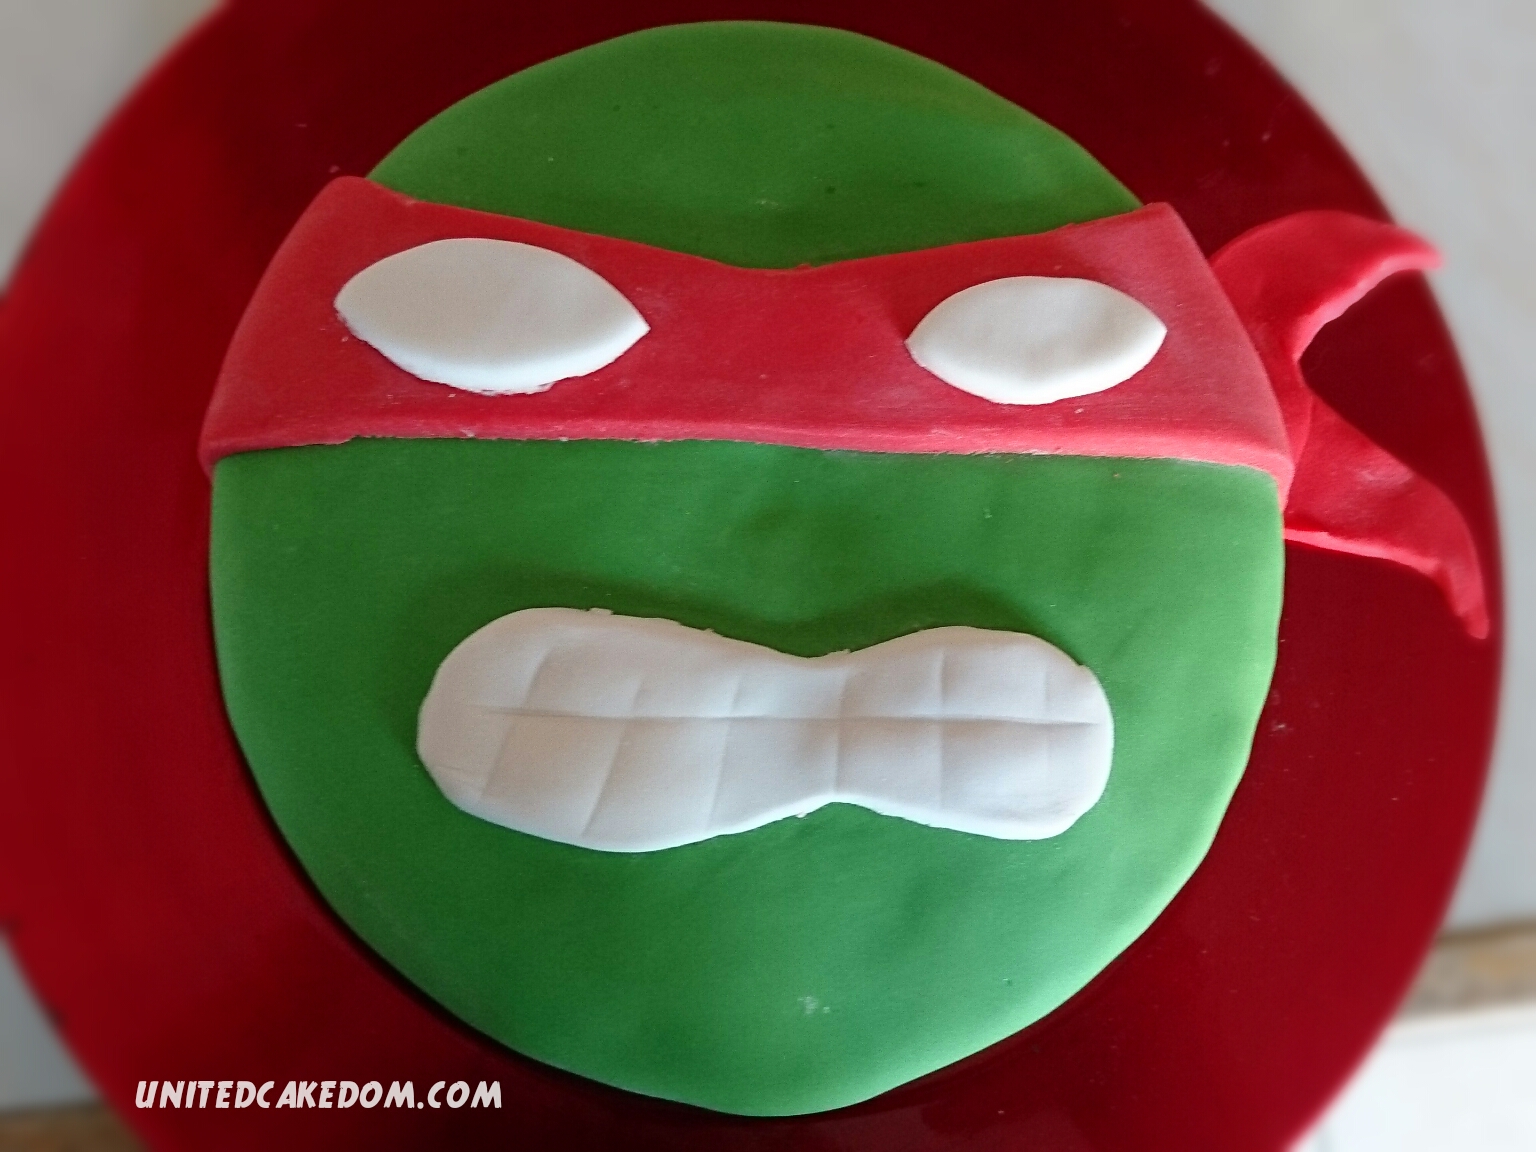
Anyway, my littlest one is now 6 years old and she asked for a chocolate turtle cake, I was happy to oblige! 

I have tried baking and tasted many chocolate cakes and most of them are dry and only mildly taste of chocolate. But I found one that works every time and it's super chocolatey!


Ninja Turtle Birthday Cake: 

chocolate cake
110g dark chocolate, broken up 
240ml boiling water, boil then measure
225g granulated sugar
195g plain flour
1/2 tsp salt 
3/4 tsp bicarbonate of soda
225g light brown sugar
120ml sunflower oil
110g sour cream
2 eggs
1 tsp vanilla extract 

Heat the oven to 180C; line and grease two 8 inch or 9 inch cake pans - if using 8 inch there will be a little batter left over perfect for cupcakes or mini cake. 
Put the broken up chocolate in a large bowl and pour the boiling water over it, leave to the side and mix the sugar, flour, salt, and bicarb of soda in a separate bowl. Leave that to the side for a moment and go back to the chocolate/water. Whisk them together until smooth, then add the brown sugar, oil, sour cream, eggs, and vanilla one at a time whisking until smooth after each addition. Add a third of the flour mixture to the chocolate mixture and whisk until smooth repeating two more times until all the dry mixture is incorporated into the wet mixture. Pour into the prepared pans about 3/4 full and bake for 30-35 minutes. Do not over fill the cake tins as they will not bake properly and over flow, I know this from personal experience. 
Leave to cool in the tins for at least 5 minutes and leave to cool completely before icing and decorating.

buttercream
250g icing sugar
80g unsalted butter, room temperature 
25ml milk
1/4 tsp vanilla extract

Beat the butter until soft and fluffy - add the icing sugar, milk, and vanilla. Beat until it's smooth and creamy. Add icing sugar if it's too soft and milk if it's too stiff. 

constructing the cake - once the cake is cooled spread the bottom layer with buttercream and place the other on top and cover that with butter cream as well. Leave a little bit of butter cream to use as a "glue" for the fondant mask/eyes/mouth. 


turtle decor
green fondant, enough to cover a 2 layer cake
white fondant, enough to make eyes/teeth
red/blue/orange/purple fondant, enough to make face mask
*I use store bought fondant. 

Dust your work surface with icing sugar to keep the fondant from sticking, roll it out as thin/thick as you like, but enough to cover the cake. I roll it out pretty thin as we aren't fondant lovers in this house. Gently wrap the fondant over the rolling pin to lift it up and lay across the cake. Gently smooth over the cake and press down around the edges. 
Then re-dust with icing sugar and roll out the color fondant for the mask. I free handed it, but if you want go online and print out a turtle mask and use it to trace. 
Again re-dust and roll out the white for the eyes and mouth. For the eyes I used circle cutters and the mouth I free handed. Like above go online and print a turtle mouth out if you want it to be exact. 


notes: recipe adapted from bake! by Nick Malgieri and hummingbird bakery cookbook by Tarek Malouf and the hummingbird bakers

Fruit & Yogurt Parfaits


For me breakfast is a thing for the weekends. It’s hard to wake up and want food right away or I should say it’s hard to wake up and want to cook right away. If I had a personal chef and breakfast was waiting for me as I got out of bed then it’s be a different story. But that’s not the story and breakfast is on me.

If there is an easy way for breakfast I will take it. When I was a teenager and started driving my sister and I to school, every once in a while we’d sneak through the McDonald’s drive through for a breakfast burrito (different then the ones here in the UK) and a fruit parfait. Maybe not the best of combinations, but hey I was a teenager and food didn’t seem to “stick” like it does now.

It was or is literally a layer of yogurt, strawberries and blueberries, topped with more yogurt and granola. Easy peasy lemon squeezy.


Since they don’t sell them here in the UK I thought I’d make it myself. Also, it is Breakfast Week! A campaign dedicated to educating the nation and celebrating breakfast, it is the most important meal of the day! Too many people skip breakfast, myself included some days....

I really hate busy as an excuse, everyone is busy, it’s what you choose to make priority and breakfast should be a priority. How would anything get done if you didn’t have the energy to do it? I am trying to make breakfast a priority and these parfaits make a good start!

They make a great breakfast because fruit and yogurt are, depending on the choice of yogurt, good for you. Plus they can be made the night before and can keep in the fridge for 1-2 nights if properly covered and ingredients were well in date when made.


Fruit & Yogurt Parfait

makes 2 (easily doubled)

8 tablespoons of yogurt, your choice (I used Arla Skyr Icelandic Style Yogurt, Honey)
3-5 strawberries, quartered
2 handfuls or 150g blueberries
baked muesli (recipe follows)

Layer two tablespoons of yogurt in each glass/container. Then add the layer of fruit and top with two more tablespoons of yogurt and the granola! or muesli. Enjoy or wrap tightly with clingfilm and save until the following day.

baked muesli

45g muesli of your choice
20g butter, melted
1 tablespoon of honey

Heat oven to 180C. Mix the muesli and melted butter, honey together. Spread on a prepared baking sheet and bake for 10-15 minutes, stirring once or twice. Leave to cool completely before breaking up and dividing between each parfait.


notes: Shake Up Your Wake Up - all about how you can get involved with Breakfast Week! I was not asked to mention or promote this campagain, I just agree and like it! I entered this into Brilliant Breakfast linky! Aria Skyr Icelandic Style Yogurt is in no way associated with this blog post or my blog, I mention it because it is what I used. I chose it because it is low in fat and sugar, but high in protein, which can help keep hunger pains at bay. Please see my contact/policy page above for more information!


August Break Day 12 Yellow

This image/picture is of a blanket my Grandmother crocheted for me one Christmas when I was younger. My sisters each got one too, my older sister had an orange one and my little sister had a green one. I liked that we didn't get pink, purple, and blue per usual. When I moved over to the UK I shoved it in one of my suitcases, it was one of the few non-clothes items I brought with me when I made the move 10+ years ago.


random fact about me: when I was little I couldn't say "yellow" I would say "yell-low." People would try to correct me, but I honestly couldn't hear what the difference was. 

Huffkins {inspired by Paddington by Michael Bond} #storybookbakes

I don’t know how many times I have written about my love of books so I won’t go into too much detail all you need to know is that I love books. Okay? Okay, so I have been trying to figure out a way to combine my love of books and food for a while now on a regular basis and I think I have found a fuss free easy way to do it! 

Basically I am going to be baking and making from whatever novel or children's book or autobiography that inspires me to do so! See that wasn't so hard! Originally I was going to make it a linky post, but I started to find that a bit stressful. The stress of getting people involved etc... however I think I've come up with an easy solution for that too! See the notes below! 

I hope to do this at least once a month, possible 2 as I actually have a list of stuff I have been wanting to make inspired by my favorite books! This month I was inspired by Paddington and here's what I made! 


My girls and I went to see Paddington with some friends before Christmas and they loved it. It is very cute! After that my girls started asking for their Paddington book to be read at bedtime. Then they dug out their Paddington Cookery Book and insisted we make something from it.

They choose Huffkins! I tried to convince them to make something else, because I didn't want them to be disappointed. See bread and I have a love hate relationship. Meaning it either loves me or hates me and I never know which it will be!

However, love or luck or something was on my side the other night when we made these! They turned out just fine! The girls loved filling the indent with marmalade and munching on them before bed!


Huffkins

500g plain flour
50g butter
pinch of salt
2 tsp sugar
7g fast action yeast
120ml milk
120ml water
12 tsp marmalade

Start by sifting the flour and rubbing the cold butter into it, to make it look like breadcrumbs. Stir in the salt and sugar before adding the yeast, leave to the side while you heat the milk and water together until it’s just warm to the touch. Make a well in the center of your dry ingredients before pouring in the heated milk and water. Using a wooden spoon start to bring the dough together, once it’s started use your hand to finish making the dough into a big ball. On a clean counter surface knead the dough for a few minutes until the dough is smooth and completely combined. Place in a clean bowl and leave in a warm place to rise for an hour.
Heat the oven to 220C and lightly grease a baking tray. Divide the dough into 12 equal pieces the best you can, then gently roll them into balls and place on the prepared baking sheet. Press them down lightly to slightly flatten them, then using your thumb press a hole in the middle of each one (this was the girls favorite part.) Leave them for another 20 minutes to rise, or until they double in size. Once they are ready, bake in the preheated oven for 20 minutes. They should have a lightly tan/brown color to them, place a teaspoon of marmalade in each indent and enjoy while reading Paddington stories!


What is your favorite Paddington story? Leave a comment below! Mine will always have to be the original and first book about how the Browns came to have him living at their house!

notes: Recipe is adapted from Paddington's Cookery Book by Lesley Young. If you, like me, have been inspired by the books you read then I would love to see what you create whether it be food or a craft or art! Please get in touch in one or more of these ways: on Twitter tag me and use the hash tag and I will like and re-tweet! On Instagram tag me and hash tag and I will like it and leave a comment. If you have Facebook like my page (or not) but add your image to the page and I will share it with the rest of my readers! If you are on Google+ good luck to you! Just kidding I'm just not very good at being active on it. So, if you do share on there please be patient with me. If you prefer Pinterest, I will be starting a group board, if you would like to be added email me at unitedcakedom(@)gmail.com, unless you tell me otherwise I will use the email you emailed me with. 

Looking for inspiration? Here are a few of my old posts that were inspired by books I have read!

Snail Rolls {hor d’oeuvres for children}

One of my earliest memories of making food are these snack rolls. It was when we were still living in Wisconsin, before we moved to Indiana when I was 5.

I remember sitting at the kitchen table, the same table my little sister and I got caught hiding under with a jar of peanut butter. My older sister found us and promptly told on us. We tried to deny it, but the peanut butter all over our faces and the finger marks in the jar told a different story.

Anyhow it was that same table that the three of us sat rolling out bread slices and trimming the crusts before covering each slice with either peanut butter or jelly, then we’d roll and cut them up before sticking with toothpicks and eating them up!

That is basically how you make Snail Roll, you can trim the crusts before or after it really doesn't matter and you can add whatever fillings you want.

I made them with my girls and we added in Cookie Butter spread, chocolate spread, peanut butter, and jelly. Other fillings that would be good are honey, marshmallow fluff, lunchmeats, cheese, cream cheese, and other sandwich fillers!

Then you roll them up before cutting up into about ½ - 1 inch rolls. As kids we thought they looked like snails so that's how they got their name. 

We shared them with friends and they were gone in minutes so I was in the kitchen making more to satisfy the hungry children!


They are great for a rainy day activity or for any party! 

notes: No snails were used in these rolls. 

Five on Friday: My five favorite Childhood Cartoons

You are only as old as you feel.

My literal self says that is stupid. You are as old as you are and that’s that.

However the very small part of me that isn’t literal says well, sometimes I feel pretty damn old and there are times when I feel young.

Those times are when I am making my girls watch cartoons that I want to watch over ones they want to watch. I can be a real hard ass.

Just kidding I’m mostly a push over. I record the ones I want to watch and watch them when no one is around so people can’t judge me.

But for this weeks Five on Friday I wanted to revisit the cartoons my sister and I watched every day after school with our afternoon snack.

Tiny Toon Adventures

Teenage Mutant Ninja Turtles


Animaniacs

Beetlejuice

Eek the Cat

notes: Pictures are from Wikipedia